Reading images
Last updated on 2026-03-31 | Edit this page
Estimated time: 17 minutes
Overview
Questions
- How do we get started in CellProfiler?
- How do we teach CellProfiler the structure of our images?
Objectives
- Load images in CellProfiler.
- Understand modules for data loading.
Understanding preprocessing modules
There are four modules that CellProfiler always uses. In this episode, we will go through each and show what they are used for.
Images
Before we can get started with analyzing our images in CellProfiler, we need to load them in. Start CellProfiler and see whether you can figure out how!
Load the images into CellProfiler
Open CellProfiler and try loading the images into CellProfiler.
You can drag and drop the two folders, DMSO and
cytoD_0.1, onto the white field in CellProfiler.
Afterwards, it should look something like this: 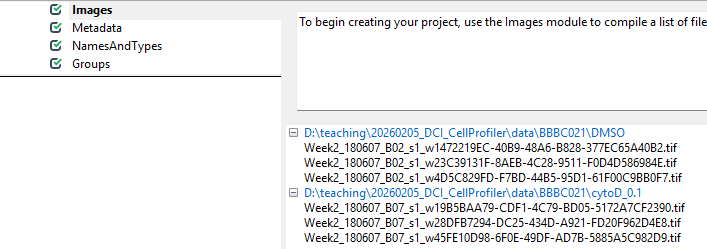
Now that CellProfiler knows where to find our images, we have to tell it a little bit about what is in the images.
Metadata
With the images loaded into CellProfiler, we can now start teaching CellProfiler what image belongs to which sample. For this, we use the Metadata module. This module’s purpose is to translate information that is captured in the file names into information that CellProfiler can understand.
Get started by clicking on yes for
Extract metadata?, upon which a menu should pop open. This
is what it looks like by default: 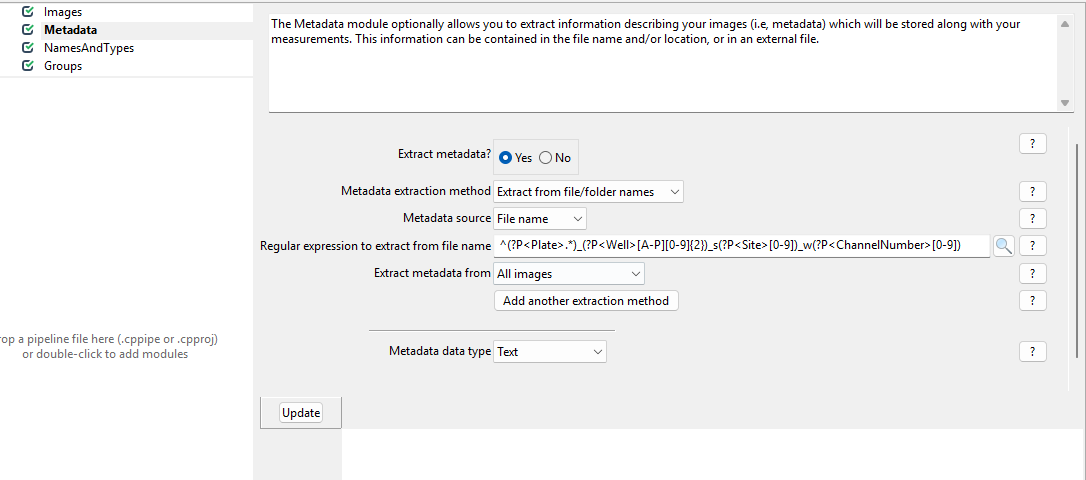
Now, we wish to inform CellProfiler about which image contains what.
To do so, set up the module as follows. 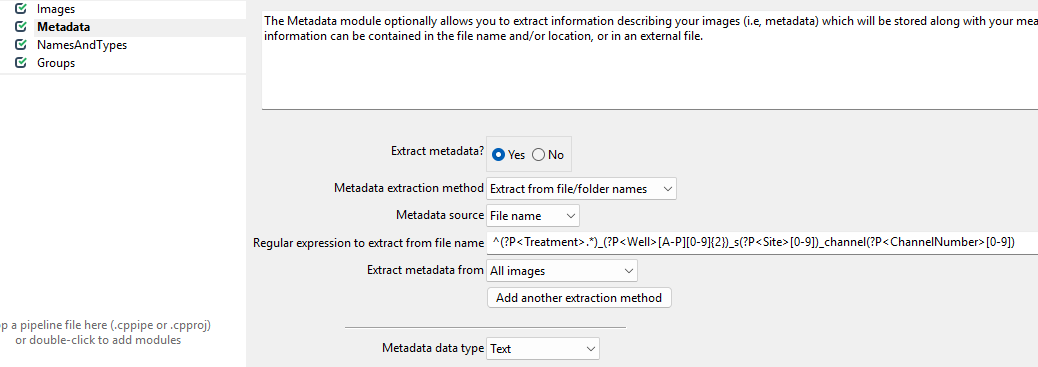
While this regular expression looks complicated, in general they can be crafted more easily using tools like regex101.com. Unfortunately, regular expressions are beyond the scope of this workshop, so feel free to just copy them from here:
^(?P<Treatment>.*)_(?P<Well>[A-P][0-9]{2})_s(?P<Site>[0-9])_channel(?P<ChannelNumber>[0-9])
What is happening here?
The images we are using have names like
cytoD_B07_s1_channel1.tif. We are trying to translate these
names into metadata with this awkward looking expression:
^(?P<Treatment>.*)_(?P<Well>[A-P][0-9]{2})_s(?P<Site>[0-9])_channel(?P<ChannelNumber>[0-9]).
This is an example of a regular expression. If you have not heard of regular expressions before, they represent a powerful way of pattern matching. Here, we use it to decode the file names.
You do not have to understand all the parts, but can you guess which part of the file name will match which part of the regular expression?
We can break up our file names by underscores. For example,
cytoD_B07_s1_channel1.tif can be read as
- Treatment:
cytoD - Well:
B07 - Site:
s1(site is the image number within a well) - Channel:
channel1
Using the regular expression, we can extract this information from each file name automatically, as long as it follows the same naming convention.
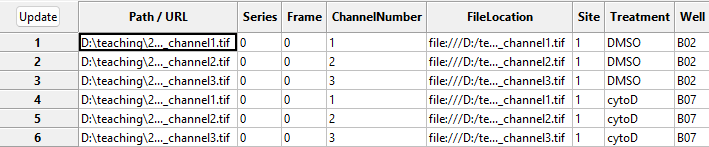
With this in hand, we can now translate the file names into metadata
that CellProfiler can understand. To see this in action, press the
Update button (top left in the below image), after which
you can see the new columns to the right containing information about
the imaging site, the week of the experiment, the imaged well, and
treatment used.
NamesAndTypes
This module allows us to rename channel numbers to stain names. Recall from the dataset introduction that our stains are for DNA, actin, and tubulin, imaged in the first, second, and third channel. To make our lives easier when working with CellProfiler, we therefore wish to rename the channels to the corresponding stains. This helps us later when we pick the stain to detect cells from.
If you are working on this workshop as part of our CellProfiler
course, you will have done this yesterday, in which case: give it a go
yourself! But if this is the first time you encounter the
NamesAndTypes module, click on the spoiler below.
The NamedAndTypes module tells CellProfiler which
channel belongs to which stain. Opening the module, we can see the
following defaults: 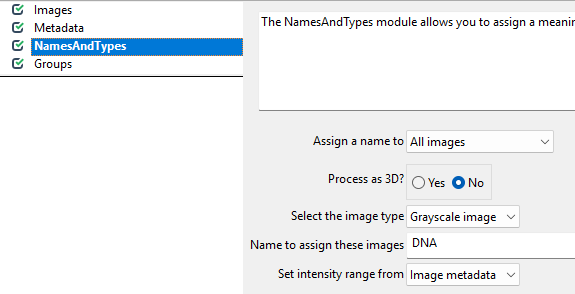
Recall that in the Metadata module we extracted the
channel number. We can now make use of this information to assign stain
names to the images. To do so, we switch the Assign a name
to Images matching rules (see below) and then assign the
channels to names. You will have to click Add another image
to add a new stain name, filling out the information as in the
screenshot and then clicking Update.

Groups
You can leave this module untouched for now. It is intended to further group images by experimental units, such as batches, plates, etc. Here, we only have two sets of images and do not need the additional grouping.
Conclusions
To summarize, the preprocessing modules do not make any changes to the images, but instead translate file and folder names into structures CellProfiler can understand. As we will see in the next tutorial, this will be useful once we start working with the images in CellProfiler to do things like detecting cell boundaries and measure fluorescence intensity. If you have made it this far - well done! It can feel a bit overwhelming to get started with CellProfiler and to have it set up properly, but now that we have it in place we can finally launch into our analysis.
- Load images by dragging/dropping them onto CellProfiler’s
Imagesmodule - The
Metadatamodule translates file names to extract metadata from file names, which will be saved along with your measurements. - The
NamesAndTypesmodule converts image names to meaningful names to be used within CellProfiler.